This is not a recipe for eating. It is a recipe for the photograph: the plate of food on your phone, shot from directly above, the one that makes strangers ask which restaurant you went to. The finished result is a crisp, evenly lit overhead frame where the food is the brightest thing in the picture and the shadows are doing quiet, useful work.
Advertisements1
I will be honest with you: the most common failure point is not the camera. It is the light. A phone under a ceiling bulb at 8 pm will produce a plate that looks like a crime scene photo, no matter how good the pasta is. Fix the light first and everything downstream gets easier.
List your tools before you touch the plate. A phone with the lens wiped clean, a window with indirect daylight, a chair or step stool to stand on, a plain surface, and a small stack of props you will mostly not use. Then we shoot.
Why You'll Love This Recipe
About the Ingredients
1 plate of finished food, plated 2 to 3 minutes ago
Hot food steams and cold food dulls, so shoot within three minutes of plating. For a stand-in while you set up, use an empty plate of the same size so you can lock focus and exposure before the real thing arrives.
1 large window with indirect daylight, north-facing preferred
North light is consistent all day and never throws hard shadows. If your only window faces south, hang a thin white curtain or tape a sheet of parchment across the glass to diffuse it.
1 white foam board or sheet of poster board, roughly 20 by 30 inches (50 by 75 cm)
This is your bounce card, and it is the single cheapest upgrade to any food photo. A sheet of aluminum foil wrapped around cardboard works if you cannot find foam board.
1 plain surface: wood board, linen cloth, or matte countertop
Matte surfaces absorb stray reflections; glossy granite and glass bounce the window straight back into the lens. A large wooden cutting board is a dependable default.
2 to 4 small props: a linen napkin, a fork, a pinch of flaky salt, a glass of water
Props should suggest a meal in progress, not a catalog spread. A used napkin and a fork resting at an angle read as human; a perfectly clean set reads as stock photography.
1 step stool or sturdy chair
You need to be directly above the plate, and arm's length is not high enough. A step stool gets your phone 30 to 36 inches (75 to 90 cm) above the surface.
1 clean microfiber cloth
A single fingerprint over the lens softens the entire frame in a way you will not notice until you open the file on a bigger screen. Wipe the lens before every session, not after.
1 small spritz of water or oil in a spray bottle (optional)
A single fine mist makes greens and herbs look freshly washed and makes a seared crust catch the light. One spray, from 12 inches away, not four.
Tips & Tricks
Lock focus and exposure before you shoot
tap and hold on the food in your camera app until the yellow box locks, then drag the exposure slider down slightly. Underexposed food looks richer than overexposed food, which looks washed out and gray.
Leave negative space
fill roughly 70 percent of the frame with the plate and let the remaining 30 percent breathe with surface and cloth. A plate jammed into every corner looks cramped and amateur.
Clean as you go, not after
wipe drips off the rim of the plate with a damp cloth before every single frame. A single smear of sauce on white ceramic is the first thing every viewer sees.
- Shoot in indirect light, never direct sun: direct sunlight at midday creates hard black shadows and blown highlights that no editing slider recovers. Move two feet back from the window and let the light wrap around the plate.
Pro Tips
Step-by-Step Instructions
1. Wipe the lens
Rub the phone lens with the microfiber cloth until it is genuinely clear, then check it against the light. Every soft, hazy food photo you have ever taken started here.
2. Set the surface
Place your board or cloth on a table within arm's reach of the window, with the light falling across the plate from the left or right rather than from behind it. Side light gives texture; backlight gives silhouette.
3. Position the bounce card
Stand the foam board on the opposite side of the plate from the window, angled slightly toward it. This fills the shadow side and takes roughly 30 seconds to get right.
4. Plate the food
Spoon the food onto the plate and build a little height in the center rather than spreading it flat. Overhead shots reward a mound with visible layers over a thin, even spread.
5. Style in five minutes
Add the fork, the napkin, and a pinch of flaky salt, then stop. Set a timer if you must, because styling expands to fill whatever time you give it and the food is getting cold.
6. Climb up and lock focus
Stand on the stool, hold the phone flat above the plate at 30 to 36 inches (75 to 90 cm), tap and hold on the food until focus locks, then drag the exposure down one notch.
7. Shoot a bracket
Take one frame, check it, then take four more slightly closer and four more slightly wider. Shoot at 1/120 second or faster so hand shake does not blur the herbs.
8. Review and pick
Open the gallery and delete anything with a soft focus, a hot highlight, or a sauce smear on the rim. Keep the two frames that read cleanly at thumbnail size.
9. Edit lightly
Raise contrast slightly, warm the white balance by a hair, and stop. If you can see the editing, you have done too much.
Delicious Variations
The Moody Dark Version
swap the white board for a black slate surface and move the bounce card closer, letting the shadows deepen for a dramatic, restaurant-menu look.
The Action Shot
instead of a still plate, pour sauce or crack pepper with one hand while shooting with the other, which trades perfection for movement and usually wins on social.
The Breakfast Window Version
shoot at 8 am with the plate on the windowsill itself, using the sill as the surface and the morning light as the only source.
How to Store Phone-Food Photo Session (The Overhead Flat Lay)
Refrigerator
The food itself keeps 3 to 4 days in a sealed container, though it will never look like the photo again. Reheat before eating, not before shooting.
Freezer
Freeze leftovers in portions for up to 2 months; the photograph, meanwhile, lives forever in your camera roll and should be backed up.
Reheating
Reheat gently on the stovetop or in a 350 F (175 C) oven for 8 to 10 minutes, and do not attempt to re-shoot reheated food without fresh garnish.
Frequently Asked Questions
Q: How do I take a good overhead photo of food with my phone?
Stand directly above the plate with the phone parallel to the table, in indirect window light, and lock focus and exposure before shooting. The parallel phone and the side window light do most of the work; everything else is decoration.
Q: What is the best lighting for phone food photography?
Indirect daylight from a north-facing window is the best light you can get for free. Direct sun is too harsh and ceiling bulbs cast a yellow-green cast that makes food look tired.
Q: Why does my food look bad in photos?
Usually it is the light, not the food: overhead bulbs, direct sun, or a dirty lens. Wipe the lens, move to a window, and turn off every other light in the room before you change anything else.
Q: How long does a phone food photo session take?
Plan about 15 minutes of setup and 35 minutes total including plating, shooting, and picking your keepers. The actual shooting is under ten minutes if the surface and light are ready first.
Q: Should I use the flash when photographing food?
No. Phone flash flattens texture, creates a hard shadow behind the plate, and reflects off sauces. Use window light and a white bounce card instead.
Set the plate down by the window, climb on the stool, and take the shot before the steam gives up. If your first frame is mediocre, that is normal; the fifth one usually is not. Measure twice, then measure again.
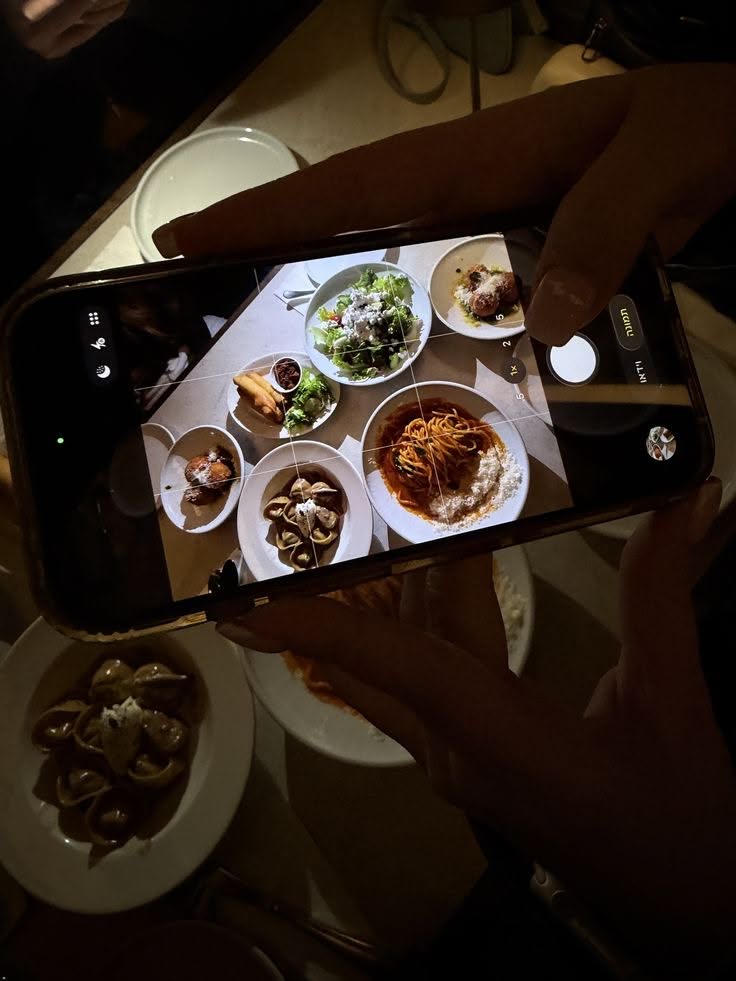
Phone-Food Photo Session (The Overhead Flat Lay)
A phone-food photo session turns one humble plate into a scroll-stopping overhead flat lay with window light, a steady hand, and a five-minute styling pass.
🧂 Ingredients
- 1 plate of finished food, plated 2 to 3 minutes ago
- 1 large window with indirect daylight, north-facing preferred
- 1 white foam board or sheet of poster board, roughly 20 by 30 inches (50 by 75 cm)
- 1 plain surface: wood board, linen cloth, or matte countertop
- 2 to 4 small props: a linen napkin, a fork, a pinch of flaky salt, a glass of water
- 1 step stool or sturdy chair
- 1 clean microfiber cloth
- 1 small spritz of water or oil in a spray bottle (optional)
📋 Instructions
- 1Wipe the lens — Rub the phone lens with the microfiber cloth until it is genuinely clear, then check it against the light. Every soft, hazy food photo you have ever taken started here.
- 2Set the surface — Place your board or cloth on a table within arm's reach of the window, with the light falling across the plate from the left or right rather than from behind it. Side light gives texture; backlight gives silhouette.
- 3Position the bounce card — Stand the foam board on the opposite side of the plate from the window, angled slightly toward it. This fills the shadow side and takes roughly 30 seconds to get right.
- 4Plate the food — Spoon the food onto the plate and build a little height in the center rather than spreading it flat. Overhead shots reward a mound with visible layers over a thin, even spread.
- 5Style in five minutes — Add the fork, the napkin, and a pinch of flaky salt, then stop. Set a timer if you must, because styling expands to fill whatever time you give it and the food is getting cold.
- 6Climb up and lock focus — Stand on the stool, hold the phone flat above the plate at 30 to 36 inches (75 to 90 cm), tap and hold on the food until focus locks, then drag the exposure down one notch.
- 7Shoot a bracket — Take one frame, check it, then take four more slightly closer and four more slightly wider. Shoot at 1/120 second or faster so hand shake does not blur the herbs.
- 8Review and pick — Open the gallery and delete anything with a soft focus, a hot highlight, or a sauce smear on the rim. Keep the two frames that read cleanly at thumbnail size.
- 9Edit lightly — Raise contrast slightly, warm the white balance by a hair, and stop. If you can see the editing, you have done too much.